– It lets you advertise for free
– Unlike your Facebook account, the fan page can be viewed without logging in & so it can be crawled by the various search engines.
– Enables you to create a dedicated fan base, enabling you to control the content
Now that you have enough reasons to create it, dive..choose your subject well and make sure you have a good name to it, because as the followers swell, you’ll have to live with that name.
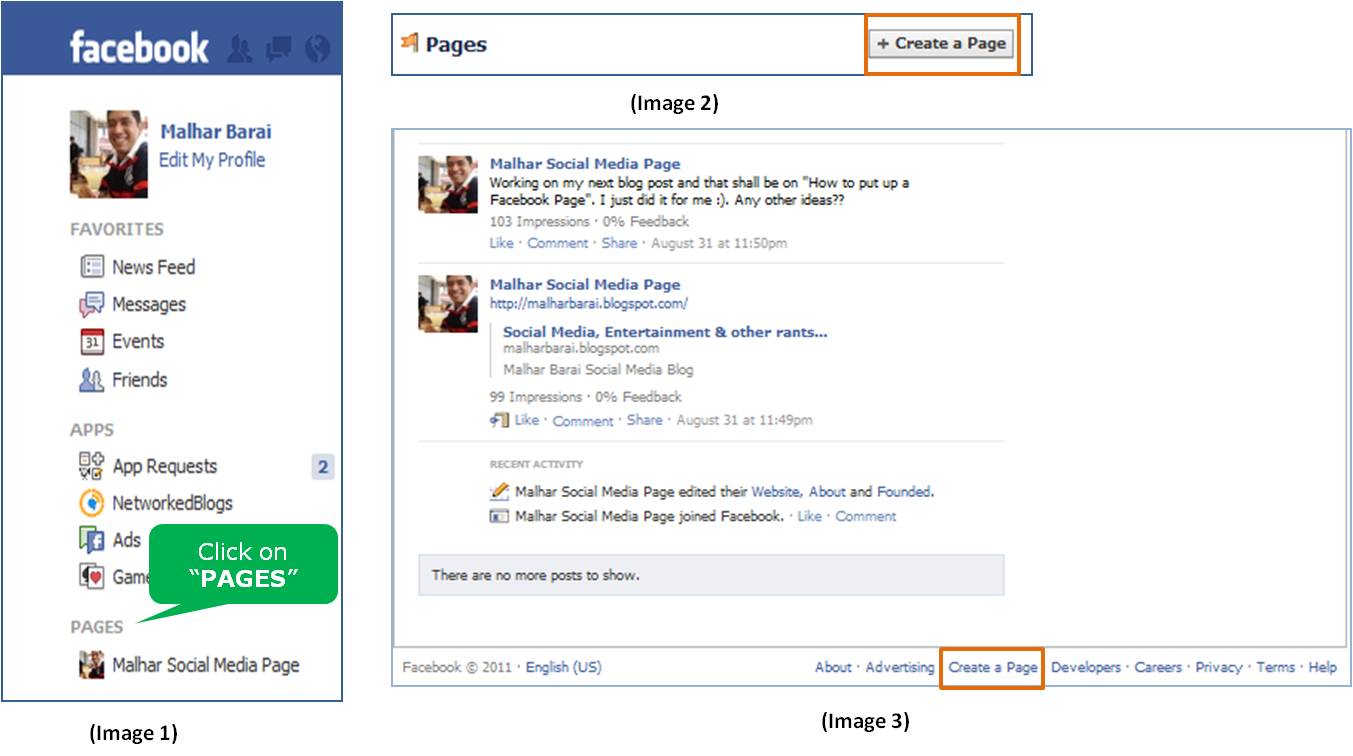
At the bottom corner of left pane on your Facebook page, you should be able to find a link with an orange flag saying PAGES (image 1).
The click will lead you “Pages” Screen. The “Create a Page” button is on the right side (image 2). A click on the button shall send you to the “Create a Page” screen.
You can also find the link “Create a Page” (image 3) at the bottom of your home screen. For benefit, I have already put the link here & incase you are already logged in, you should be able to see the “Create a Page” screen.
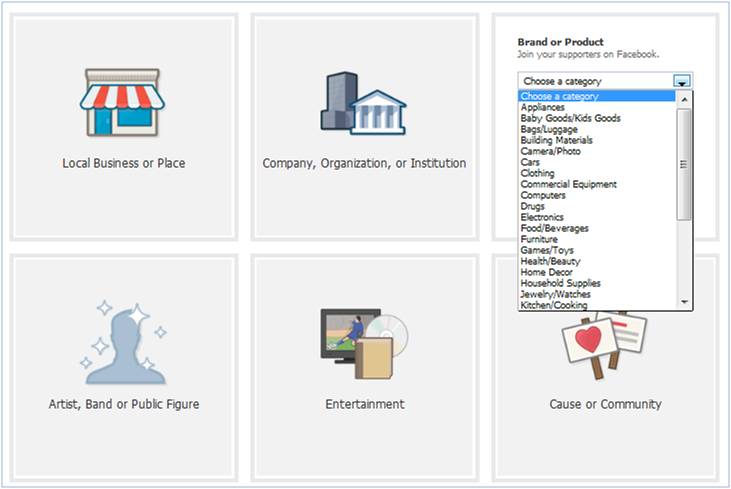
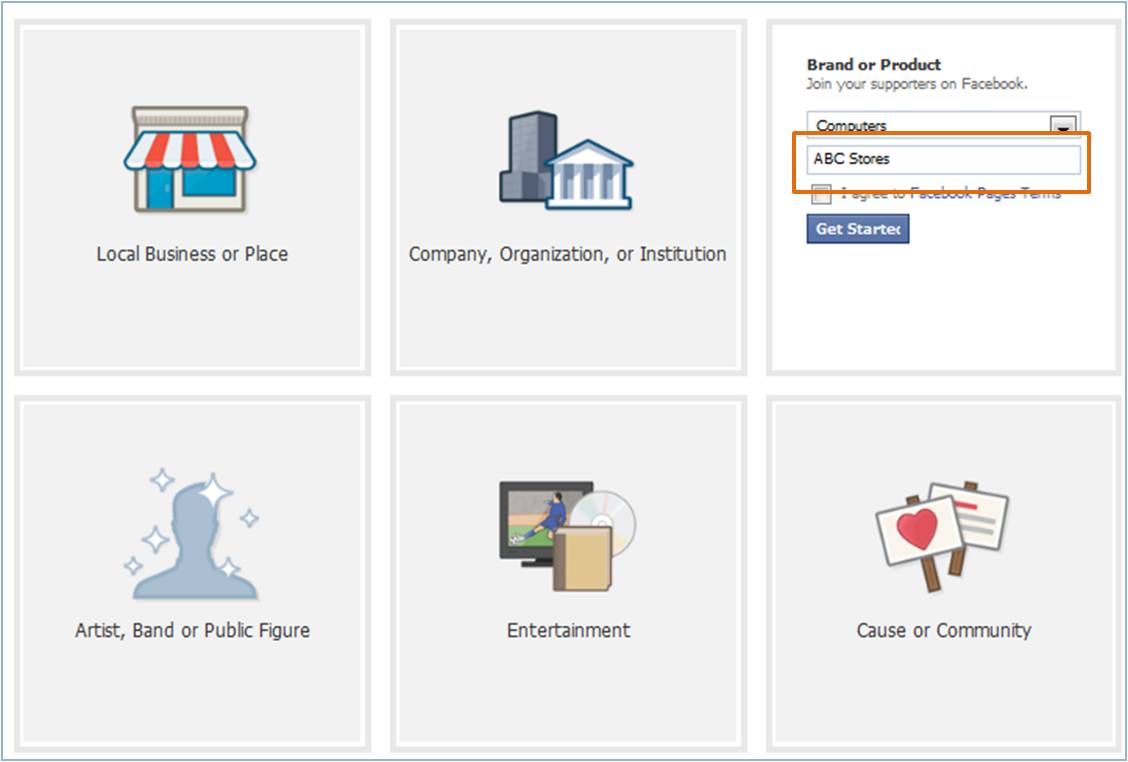
Step #2 – Categories
 |
| (Image 4) |
 |
| (Image 5) |
Now that you have selected a category which is the closest to your page content, go ahead & give a name (image 5), but a word of CAUTION – the name cannot be changed later (can be changed only until 100 fans) & it is the name which the search engines shall pick.
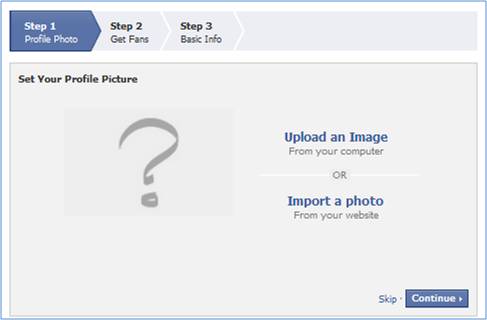
Step #3 – Logo
 |
| (Image 6) |
When you have accepted the Facebook T&C, you’ll be presented with the screen to upload your logo (image 6). Skip the step, if you wish to upload the logo later or you can upload your business logo. The logo can be either uploaded from the local computer or you can provide the URL of logo image file from the business website.
 |
| (Image 7) |
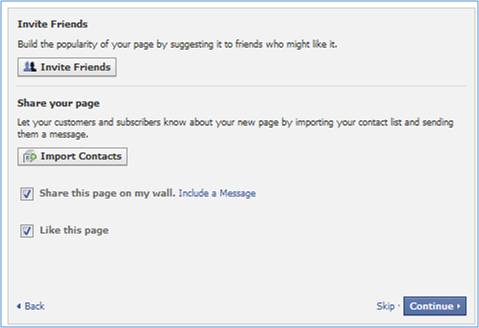
Popularize your page now. This page (image 7) allows you to invite friends from your existing contacts, import contacts and also share the page on your Facebook wall. Do make sure to “like” your own page. Atleast you should be happy about it 🙂
Step #5 – Fan Page
 |
| (Image 8) |
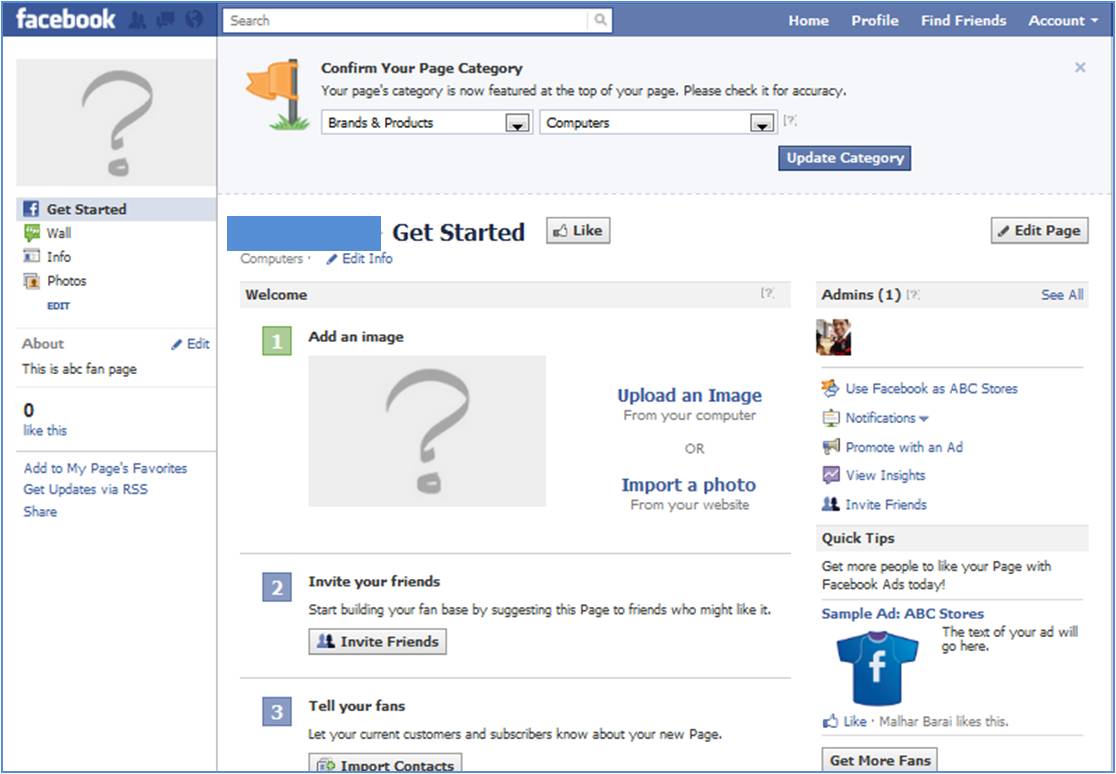
Congratulations!! Now you have your own Facebook Fan Page (image 8). It will go ahead & ask you to confirm the category of the page, make the changes if you think you’ve classified it under a different bucket.
Step #6 – Promotion
 |
| (Image 9) |
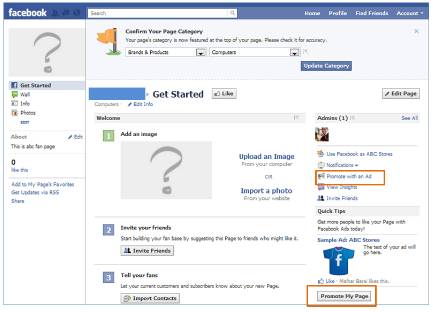
Since you have created a Fan page now, the next step would be to catch attention of millions of users of Facebook & the best way to do a “promotion” is create an “ad”. On the right pane of the page, you will be able see the “Promote with an Ad” & “Promote my Page” button (image 9), which leads to creation of an “ad”
The promotion is based on the pricing limits you set. Facebook optimizes the delivery of ads in order gain maximum clicks.
Step #7 – Content Sharing
 |
| (Image 10) |
Finally, the page has been created & promotion campaign has been set up. The next obvious step would be create meat for the page. Start posting & sharing information on your page with the many options. You might want to share content using text, link, photos. Go ahead & do it. It’s your page now.
Step #8 – Analytics
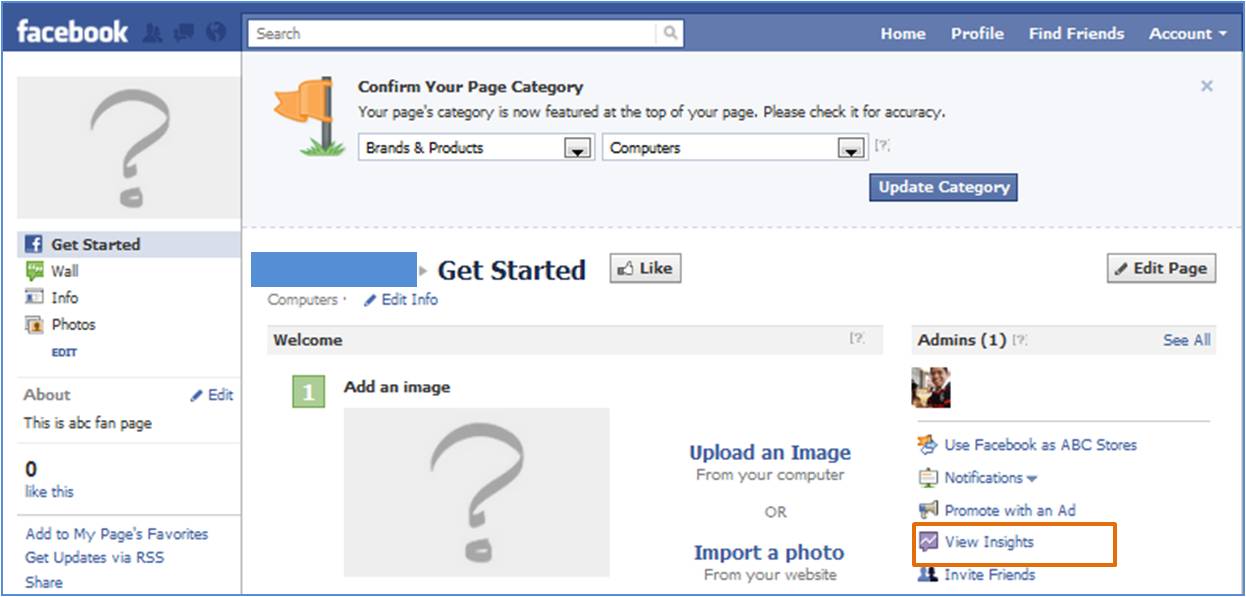
Still at the end of the day, you would definitely be interested in getting information about the number of visitors & content being clicked. “View Insights” link on the right pane of the page helps you view the information. The “Insights” page provides information by week, month, year & also allows to export data in Excel and CSV formats.
While writing of this post, I did come across the Top 100 Popular Facebook Pages.
Though Facebook has already detailed the page creation process here the post above was my 2 cents. I have already created my page on Social Media and sharing some interesting content over it. Don’t forget to visit it & “like” the page.
Thanks for reading through & would love to read your feedback on the post.
Pingback: Facebook Adds New Feature - Like Pages - Malhar Barai
Pingback: 20 Useful Tips to Manage Facebook Business Page [Infographic] - Malhar Barai